Delicious Cake Pops With Mold Recipe: A Sweet Treat!
Are you looking for a simple and delicious treat that will impress your friends and family? Look no further! Introducing cake pops with mold recipe – the perfect solution for your sweet cravings. With just a few ingredients and a little bit of creativity, you can create these adorable bite-sized treats that are sure to be a hit at any gathering. Whether you’re a beginner baker or a seasoned pro, this recipe is easy to follow and guarantees fantastic results. So, let’s dive right in and learn how to make these irresistible cake pops with mold recipe!
Cake Pops with Mold Recipe
Cake pops are a delightful and versatile treat that are loved by kids and adults alike. They are not only delicious but also visually appealing, making them perfect for parties, events, or even as a special indulgence. While there are various methods to make cake pops, one popular and convenient approach is using a mold. In this article, we will explore a step-by-step guide on how to make cake pops using a mold, along with some tips and tricks to ensure your cake pops turn out perfectly every time.
What You Will Need
Before we jump into the recipe, let’s gather all the necessary ingredients and equipment:
- 1 box of cake mix (any flavor of your choice)
- Ingredients required for the cake mix (usually eggs, oil, and water)
- Frosting (about 1/2 cup, preferably matching the flavor of the cake mix)
- Cake pop mold
- Lollipop sticks
- Melting chocolate or candy melts in various colors
- Sprinkles, colored sugar, or other decorations (optional)
- Small microwave-safe bowl
- Spoon or spatula
- Wax paper or parchment paper
- Cake pop stand or foam block
Step 1: Prepare the Cake
The first step in making cake pops with a mold is to prepare the cake. Follow the instructions on the cake mix box and bake the cake accordingly. Once the cake is fully baked, remove it from the oven and let it cool completely.
Step 2: Crumble the Cake
Once the cake has cooled down, it’s time to crumble it into fine pieces. You can do this by breaking the cake apart with your hands or by using a fork. Make sure to break down any large chunks and aim for a texture similar to breadcrumbs.
Step 3: Add Frosting
In this step, we will add the frosting to the crumbled cake. The frosting acts as a binding agent, helping the cake pops stay together. Add about 1/2 cup of frosting to the crumbled cake and mix well until the cake crumbs and frosting are fully combined. The mixture should be moist and easily moldable.
Step 4: Fill the Mold
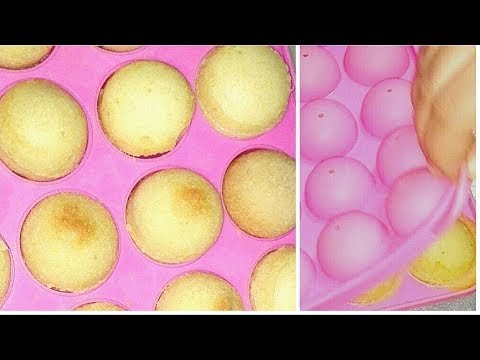
Now it’s time to use the cake pop mold. Take a small handful of the cake mixture and press it firmly into one side of the mold. Make sure to fill the mold completely and level off any excess mixture using a spatula or knife.
Step 5: Assemble the Cake Pops
Once the mold is filled, place the other half of the mold on top and gently press the two halves together. This will help shape the cake pop and remove any excess mixture. Use your fingertips to clean up any excess mixture around the edges.
Step 6: Chill and Remove from Mold
After assembling the cake pops, place the mold in the refrigerator for about 20-30 minutes to allow them to set. Chilling the cake pops will make it easier to remove them from the mold without losing their shape.
Once chilled, gently open the mold and carefully remove the cake pops. If they don’t come out easily, you can gently tap the mold on the countertop or apply slight pressure from the back of the mold to release them.
Step 7: Insert Lollipop Sticks
Now it’s time to add the lollipop sticks to the cake pops. Dip the tip of each lollipop stick into melted chocolate or candy melts and insert it into the bottom of each cake pop, about halfway through. This will help secure the stick and prevent the cake pop from falling off.
Step 8: Decorate the Cake Pops
Once the sticks are inserted, it’s time to let your creativity shine and decorate the cake pops. Melt the chocolate or candy melts in various colors according to the package instructions. Dip each cake pop into the melted chocolate, ensuring it is fully coated. Gently tap off any excess chocolate.
While the chocolate is still wet, you can add sprinkles, colored sugar, or other decorations to enhance the appearance of the cake pops. Place the decorated cake pops on a wax paper or parchment paper-lined tray or cake pop stand to allow the chocolate to harden.
Repeat the decorating process for all the cake pops, and feel free to experiment with different colors and designs to create a stunning assortment.
Tips and Tricks
Here are some tips and tricks to ensure your cake pops turn out beautifully:
- Make sure the cake is completely cooled before crumbling it. Otherwise, the mixture may become too moist.
- When adding frosting to the crumbled cake, start with a smaller amount and gradually add more until the desired texture is achieved. You want the mixture to be moist enough to hold its shape but not too sticky.
- If the cake mixture is too dry, you can add a bit more frosting. On the other hand, if it is too moist, you can add a small amount of cake crumbs to balance it out.
- When filling the mold, press the mixture firmly to ensure it fills all the crevices. This will help create a defined shape for the cake pops.
- Chilling the cake pops in the refrigerator before removing them from the mold is crucial. It helps them hold their shape and makes the removal process easier.
- For a smoother release from the mold, you can lightly grease the mold with non-stick cooking spray before filling it with the cake mixture.
- Allow the chocolate or candy melts to cool slightly before dipping the cake pops. This will help create a smoother and more even coating.
- If you don’t have a cake pop stand or foam block, you can use a sturdy cup or container filled with rice or Styrofoam to hold the cake pops upright while the chocolate sets.
Cake pops made using a mold are a fun and convenient way to create beautiful and delicious treats. By following the step-by-step recipe and utilizing the tips and tricks provided, you can easily master the art of making cake pops with a mold. Whether you’re hosting a party or simply indulging in a sweet treat, these delightful bites are sure to impress. So, grab your ingredients and give this recipe a try – you won’t be disappointed!
How to make CAKE POPS using silicone mold. Cake pop recipe with tips to decorate
Frequently Asked Questions
What ingredients do I need to make cake pops with a mold?
To make cake pops using a mold, you will need the following ingredients:
- Cake mix (your choice of flavor)
- Buttercream frosting
- Candy melts or chocolate chips
- Sprinkles or other decorations
How do I prepare the cake pops mixture?
Start by baking the cake according to the instructions on the box. Once it has cooled, crumble the cake into a large mixing bowl. Add buttercream frosting gradually and mix until you achieve a dough-like consistency. The amount of frosting you need may vary, so add it gradually to avoid making the mixture too wet.
How do I use a mold to make cake pops?
Grease the cake pop mold lightly with cooking spray or vegetable oil. Take a small portion of the cake mixture and press it firmly into the mold, making sure to fill all the cavities. Gently tap the mold on a flat surface to remove any air bubbles. Place the mold in the refrigerator for about 15 minutes to set.
How do I remove the cake pops from the mold?
After the cake pops have set in the refrigerator, carefully remove the mold from the fridge. Flip the mold upside down and gently tap it on a clean surface to release the cake pops. If they don’t come out easily, you can also use a toothpick or a small knife to help loosen them. Be gentle to avoid breaking the cake pops.
How do I decorate the cake pops?
Melt the candy melts or chocolate chips according to the instructions on the package. Dip the end of a lollipop stick into the melted chocolate, then insert it into the bottom of a cake pop. Dip the cake pop into the melted chocolate, allowing any excess to drip off. Decorate with sprinkles or other decorations while the coating is still wet. Place the decorated cake pops onto a lined baking sheet or a cake pop stand to set.
How should I store cake pops made with a mold?
Store your cake pops in an airtight container at room temperature or in the refrigerator for up to a week. If you want to store them longer, you can individually wrap each cake pop in plastic wrap and freeze them. Thaw frozen cake pops in the refrigerator before enjoying.
Final Thoughts
Cake pops with mold recipe is a delightful and creative way to enjoy bite-sized treats. By following this recipe, you can effortlessly make cake pops using molds, allowing for consistent shapes and sizes. Whether you are a novice or an experienced baker, these cake pops are sure to impress. The process involves baking a cake, crumbling it, mixing with frosting, shaping into balls, and then inserting sticks. Finally, dip the pops in chocolate or candy melts and decorate to your liking. With this recipe, you can easily create beautiful and delicious cake pops with mold, perfect for any occasion.

