Delicious Cherry Buckle Recipe: A Mouthwatering Dessert
Looking for a delicious and easy cherry buckle recipe? Look no further! This mouthwatering dessert is bursting with juicy cherries, a tender cake base, and a sweet crumbly topping that will have you coming back for seconds. Whether you’re a seasoned baker or just getting started, this recipe is perfect for anyone looking to satisfy their sweet tooth. So grab your apron and get ready to whip up a delightful cherry buckle that will impress your family and friends. Get ready to indulge in this delectable treat that is sure to become a new favorite in your dessert repertoire. Let’s dive right in!
Cherry Buckle Recipe: A Scrumptious Treat for Any Occasion
Looking for a delightful dessert that combines the tartness of cherries with a tender cake-like texture? Look no further than the classic cherry buckle. Whether you’re hosting a dinner party, celebrating a special occasion, or simply craving a sweet treat, this recipe is sure to delight your taste buds. In this article, we’ll dive into the fascinating world of cherry buckle, its origins, variations, and step-by-step instructions to create this mouthwatering dessert at home.
What is a Cherry Buckle?
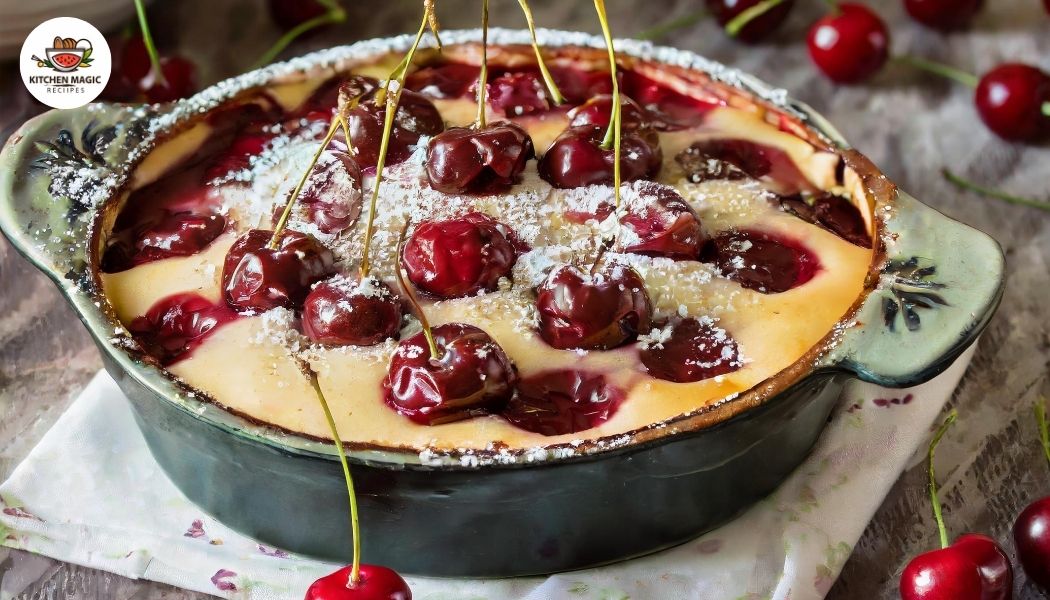
A cherry buckle is a traditional American dessert that originated in the colonial times. It falls into the category of fruit cobblers or crisps and is often referred to as a buckle due to the way the cake batter “buckles” or collapses around the fruit as it bakes. This results in a beautifully rustic appearance that adds to its charm.
The star ingredient of a cherry buckle, as the name suggests, is cherries. Whether you opt for fresh cherries when they’re in season or use frozen cherries year-round, their vibrant flavor shines through in every bite. The cherries are placed atop a buttery batter and then baked to perfection.
A Brief History of Cherry Buckle
The exact origins of the cherry buckle are unclear, but it is believed to have emerged in the United States during the 18th century. Early settlers would often create desserts that made use of the fruits available to them, and cherries were a popular choice due to their abundance in certain regions.
Over the years, the cherry buckle has become a beloved dessert across the country, with variations popping up in different states. While the original recipe remains the same, creative bakers have incorporated their own twists to make it even more delectable.
Ingredients You’ll Need
Before diving into the detailed recipe, let’s take a look at the essential ingredients needed to make a cherry buckle:
- 2 cups of all-purpose flour
- 1 ½ teaspoons of baking powder
- ½ teaspoon of salt
- ½ cup of unsalted butter, softened
- 1 cup of granulated sugar
- 2 large eggs
- 1 teaspoon of vanilla extract
- ½ cup of milk
- 4 cups of pitted cherries (fresh or frozen)
- ¼ cup of brown sugar for topping
Note: Feel free to adjust the quantities depending on the number of servings you wish to make.
Step-by-Step Instructions
Now that we have all the ingredients ready, let’s dive into the step-by-step process of making a scrumptious cherry buckle:
Step 1: Preparing the Batter
- Preheat your oven to 350°F (175°C) and grease a 9×9-inch baking dish.
- In a medium-sized bowl, whisk together the all-purpose flour, baking powder, and salt. Set aside.
- In a separate large mixing bowl, cream together the softened butter and granulated sugar until light and fluffy.
- Add the eggs one at a time, mixing well after each addition. Stir in the vanilla extract.
- Gradually add the dry ingredients to the butter mixture, alternating with the milk. Mix until just combined, being careful not to overmix.
Step 2: Adding the Cherries
- Gently fold in the pitted cherries into the batter, ensuring they are evenly distributed.
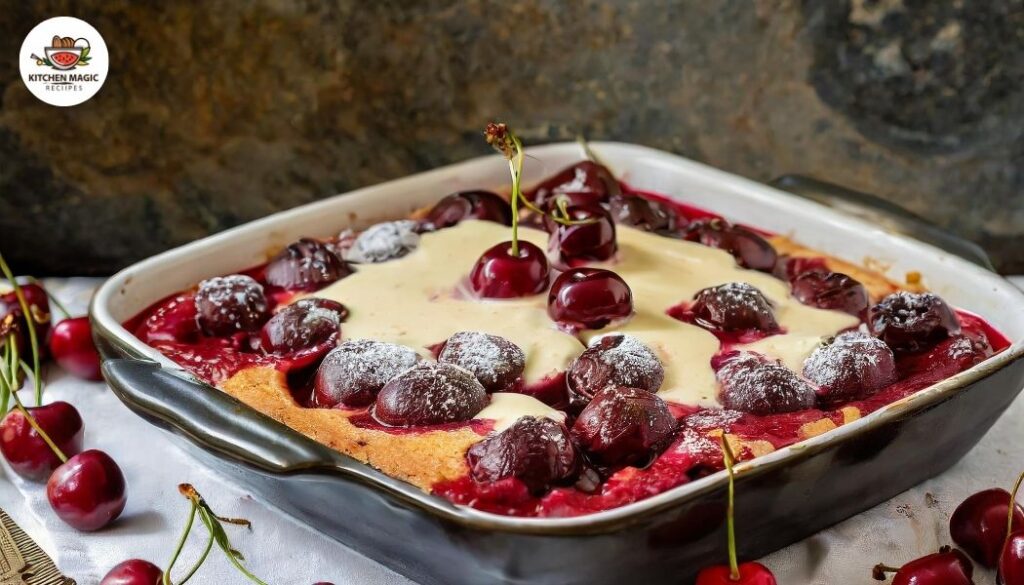
- Transfer the batter to the greased baking dish and spread it out evenly.
Step 3: Topping it Off
- Sprinkle the brown sugar evenly over the batter, creating a sweet and slightly caramelized topping.
Step 4: Baking the Cherry Buckle
- Place the baking dish in the preheated oven and bake for 40-45 minutes, or until the top is golden brown and a toothpick inserted in the center comes out clean.
- Remove the cherry buckle from the oven and allow it to cool for a few minutes before serving.
Variations and Serving Suggestions
The beauty of the cherry buckle recipe lies in its versatility. Here are a few variations and serving suggestions to help you elevate this dessert even further:
1. Streusel Topping
If you want to add an extra layer of texture, consider adding a streusel topping to your cherry buckle. Simply combine flour, brown sugar, and cold butter, then crumble it over the batter before baking. This will create a delightful crispy crust on top.
2. Almond Extract
For a twist on the classic recipe, substitute the vanilla extract with almond extract. The subtle almond flavor pairs beautifully with the cherries and adds a unique dimension to the dessert.
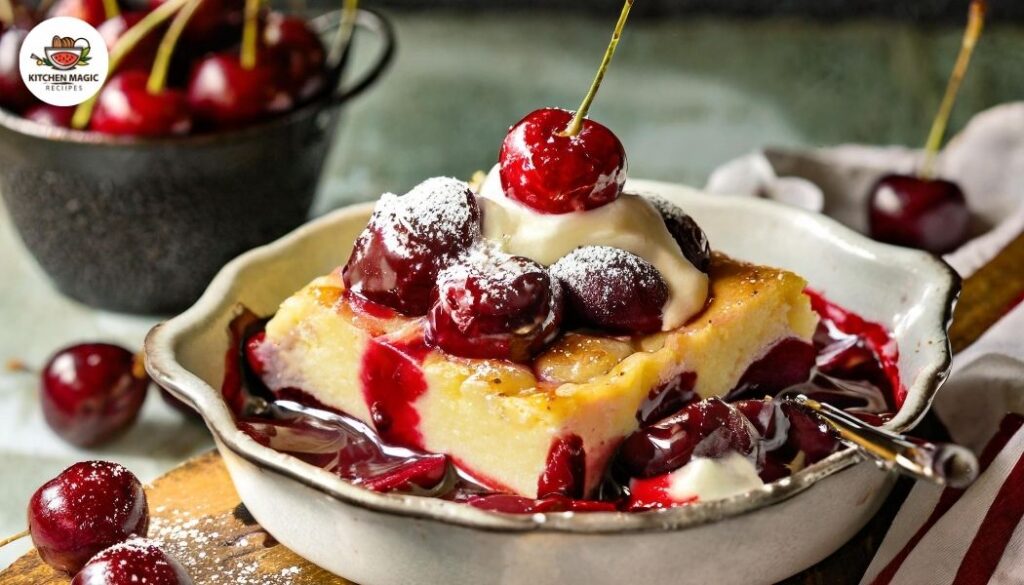
3. Serving Suggestions
While a cherry buckle is delightful on its own, you can take it to the next level by serving it with a dollop of freshly whipped cream or a scoop of vanilla ice cream. The creamy accompaniments complement the tangy cherries and bring a delightful contrast to each bite.
4. Mixed Berry Buckle
If you’re feeling adventurous, you can experiment with different fruits instead of cherries. A mixed berry buckle with a combination of strawberries, blueberries, and raspberries creates a burst of flavors and colors that are equally irresistible.
Tips for Perfecting Your Cherry Buckle
To ensure your cherry buckle turns out perfectly every time, here are a few helpful tips:
- Use ripe but firm cherries to achieve the ideal balance of tartness and sweetness.
- Avoid overmixing the batter to prevent a dense texture. Mix until the ingredients are just combined.
- Allow the cherry buckle to cool for a few minutes after baking to allow the flavors to meld together.
- Store any leftovers in an airtight container in the refrigerator. The cherry buckle can be enjoyed for up to three days.
With these tips in mind, you’ll be well on your way to mastering the art of cherry buckle baking.
Now that you have a delightful cherry buckle recipe at your fingertips, it’s time to gather your ingredients and embark on a sweet and tangy culinary adventure. Whether you’re a seasoned baker or just starting your culinary journey, this recipe guarantees a delicious outcome that will impress your loved ones or guests. So, tie on your apron, preheat your oven, and get ready to savor the delectable flavors of a homemade cherry buckle.
Frequently Asked Questions
Can I use frozen cherries for this cherry buckle recipe?
Yes, you can use frozen cherries for this cherry buckle recipe. Simply thaw the cherries and drain any excess liquid before using them in the recipe.
Can I substitute the sour cream with yogurt in this recipe?
Yes, you can substitute sour cream with yogurt in this cherry buckle recipe. Both sour cream and yogurt add moisture and tanginess to the buckle. Greek yogurt works particularly well as a substitute for sour cream.
Can I use a different fruit instead of cherries?
Yes, you can use a different fruit instead of cherries in this buckle recipe. Blueberries, raspberries, peaches, or apples would work well as alternatives. Adjust the quantity of the fruit accordingly, keeping in mind the desired sweetness and texture.
Can I use a gluten-free flour blend for this buckle recipe?
Yes, you can use a gluten-free flour blend as a substitute for all-purpose flour in this cherry buckle recipe. Make sure to choose a gluten-free flour blend suitable for baking, and follow the recommended substitution ratio provided on the packaging.
Can I make this cherry buckle recipe ahead of time?
Yes, you can make this cherry buckle recipe ahead of time. Once baked, allow the buckle to cool completely, then cover it tightly and store it at room temperature for up to 2 days. Alternatively, you can refrigerate it for up to 4 days. Warm slices before serving if desired.
Can I freeze the cherry buckle?
Yes, you can freeze the cherry buckle for future enjoyment. After baking and cooling the buckle, wrap it tightly in plastic wrap and place it in a freezer-safe container or bag. It can be stored in the freezer for up to 3 months. Thaw the buckle in the refrigerator overnight before serving.
Final Thoughts
The cherry buckle recipe is a delightful dessert that combines the sweetness of fresh cherries with a tender cake-like base. With its burst of fruity flavors and buttery crumb topping, this dessert is a crowd-pleaser. The recipe is simple and easy to follow, allowing both novice and experienced bakers to enjoy the process. Whether served warm with a scoop of vanilla ice cream or enjoyed as a morning treat with a cup of coffee, the cherry buckle recipe is a versatile and delicious way to satisfy your sweet tooth. So why not give it a try and indulge in the mouthwatering goodness of this classic dessert?