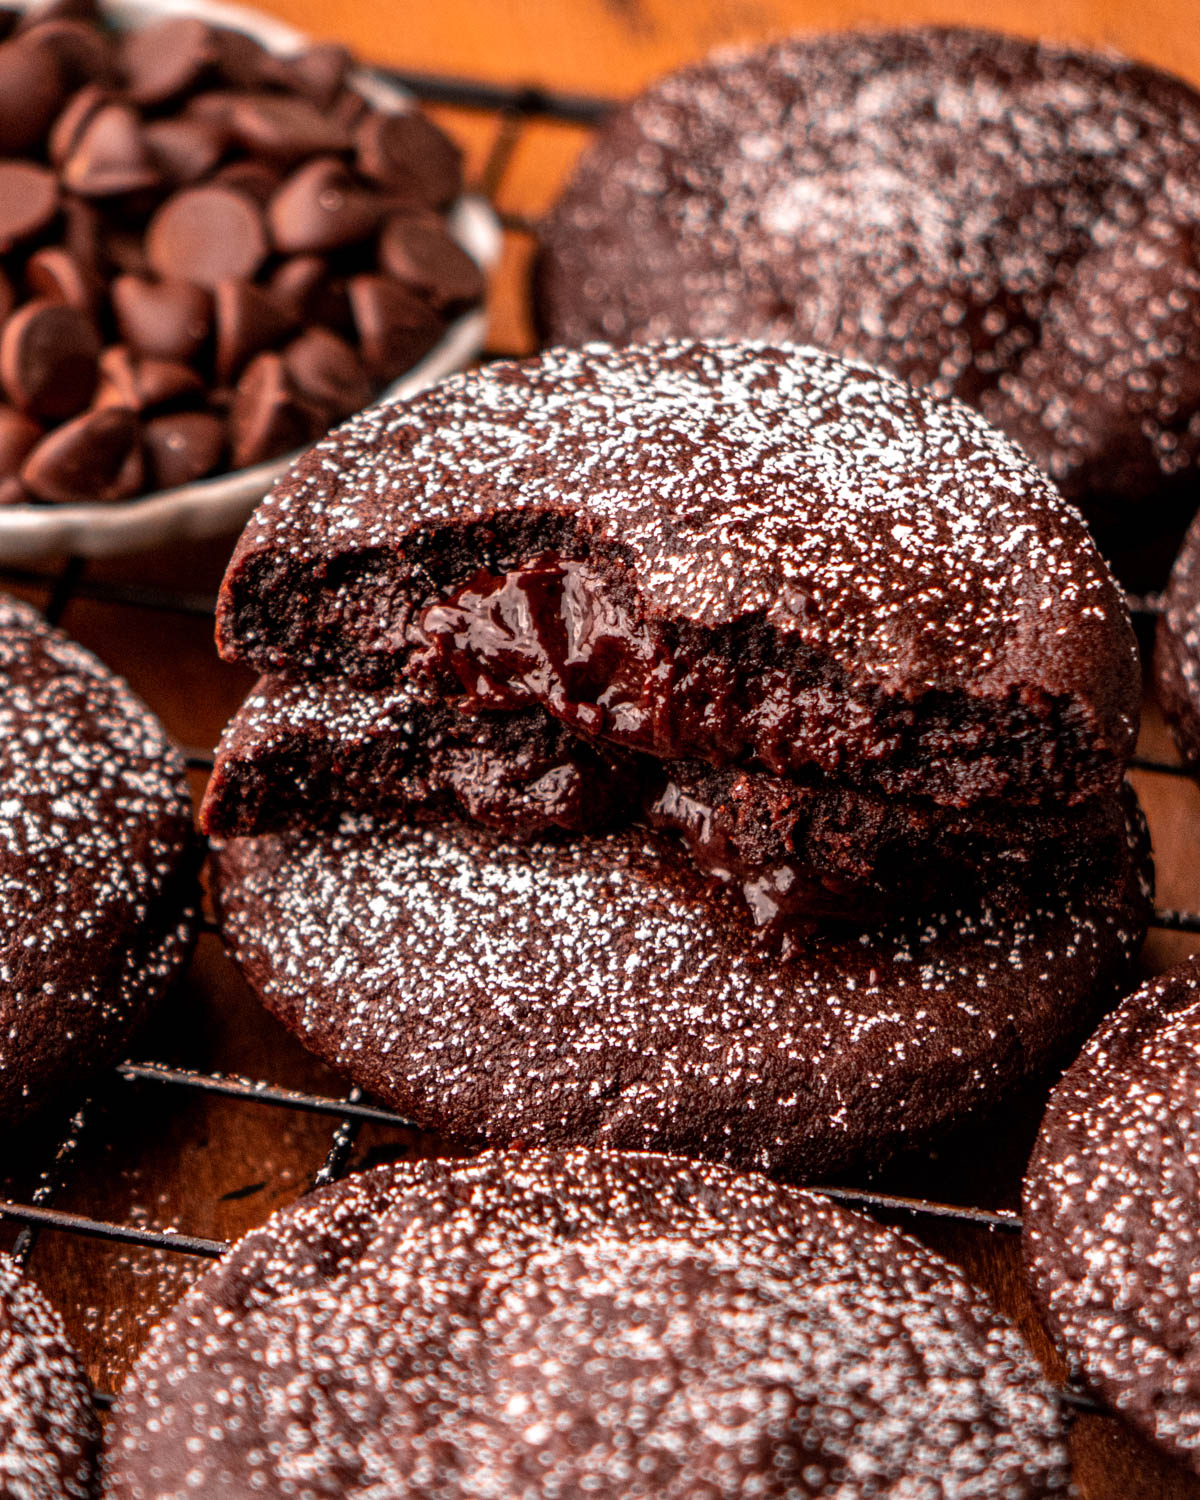
Chocolate Lava Cookie Recipe: Step by Step Guide
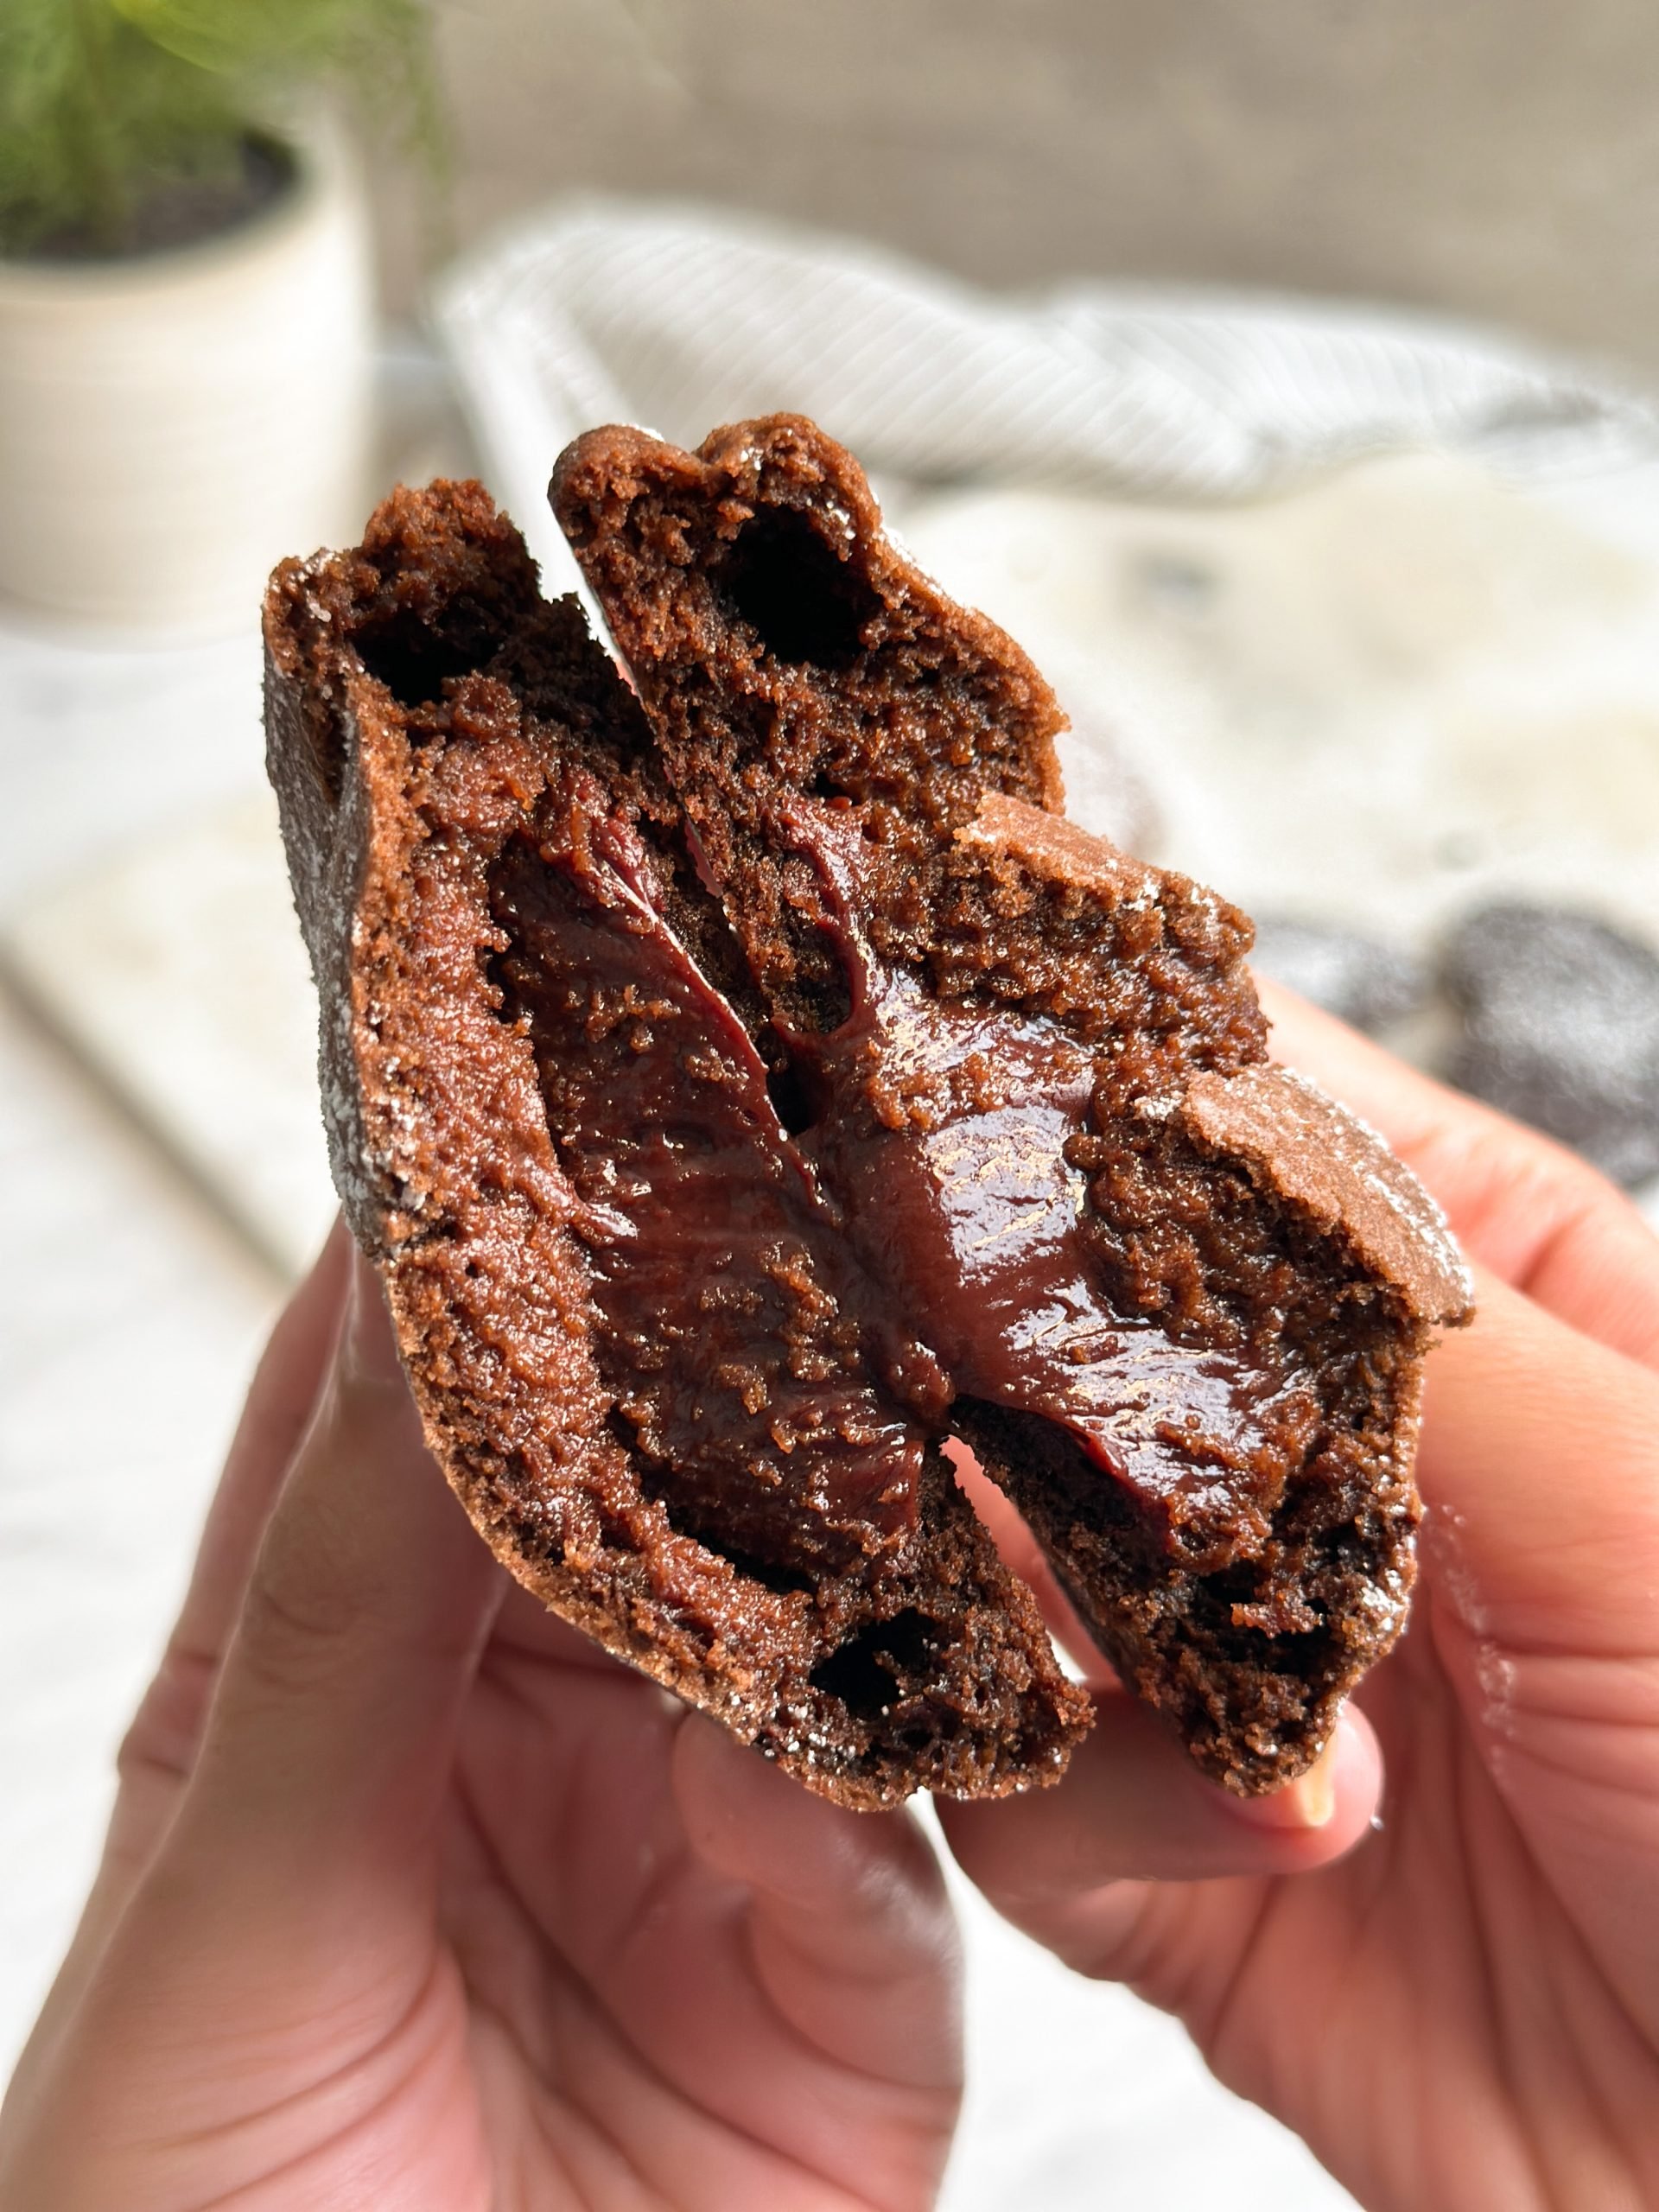
Easily make a delicious Chocolate Lava Cookie with this step-by-step guide. Indulge in gooey, chocolatey goodness.
Craving a decadent dessert that oozes with rich chocolate flavor? Look no further than the irresistible Chocolate Lava Cookie. This simple yet impressive dessert will satisfy your sweet tooth and impress your guests. Easy to make with a few basic ingredients, this recipe is perfect for both beginners and experienced bakers alike.
Follow along with our step-by-step instructions to create a mouthwatering treat that is sure to become a new favorite. Get ready to delight your taste buds with this delectable Chocolate Lava Cookie recipe.
Credit: www.chelseasmessyapron.com
Ingredients
When making delectable Chocolate Lava Cookies, the ingredients play a crucial role in achieving the perfect balance of rich chocolate flavor and gooey texture.
Butter
Butter provides the necessary fat content for a moist and decadent cookie.
Dark Chocolate
Dark chocolate adds depth and intensity to the cookie’s flavor profile.
Sugar
Sugar sweetens the cookies and contributes to their chewy texture.
Eggs
Eggs are essential for binding the ingredients together and adding structure.
All-purpose Flour
All-purpose flour serves as the base ingredient, providing the necessary structure for the cookies.
Cocoa Powder
Cocoa powder intensifies the chocolatey taste of the cookies.
Vanilla Extract
Vanilla extract enhances the overall flavor profile and adds a subtle sweetness.
Salt
Salt balances the sweetness of the cookies and enhances the chocolate flavor.
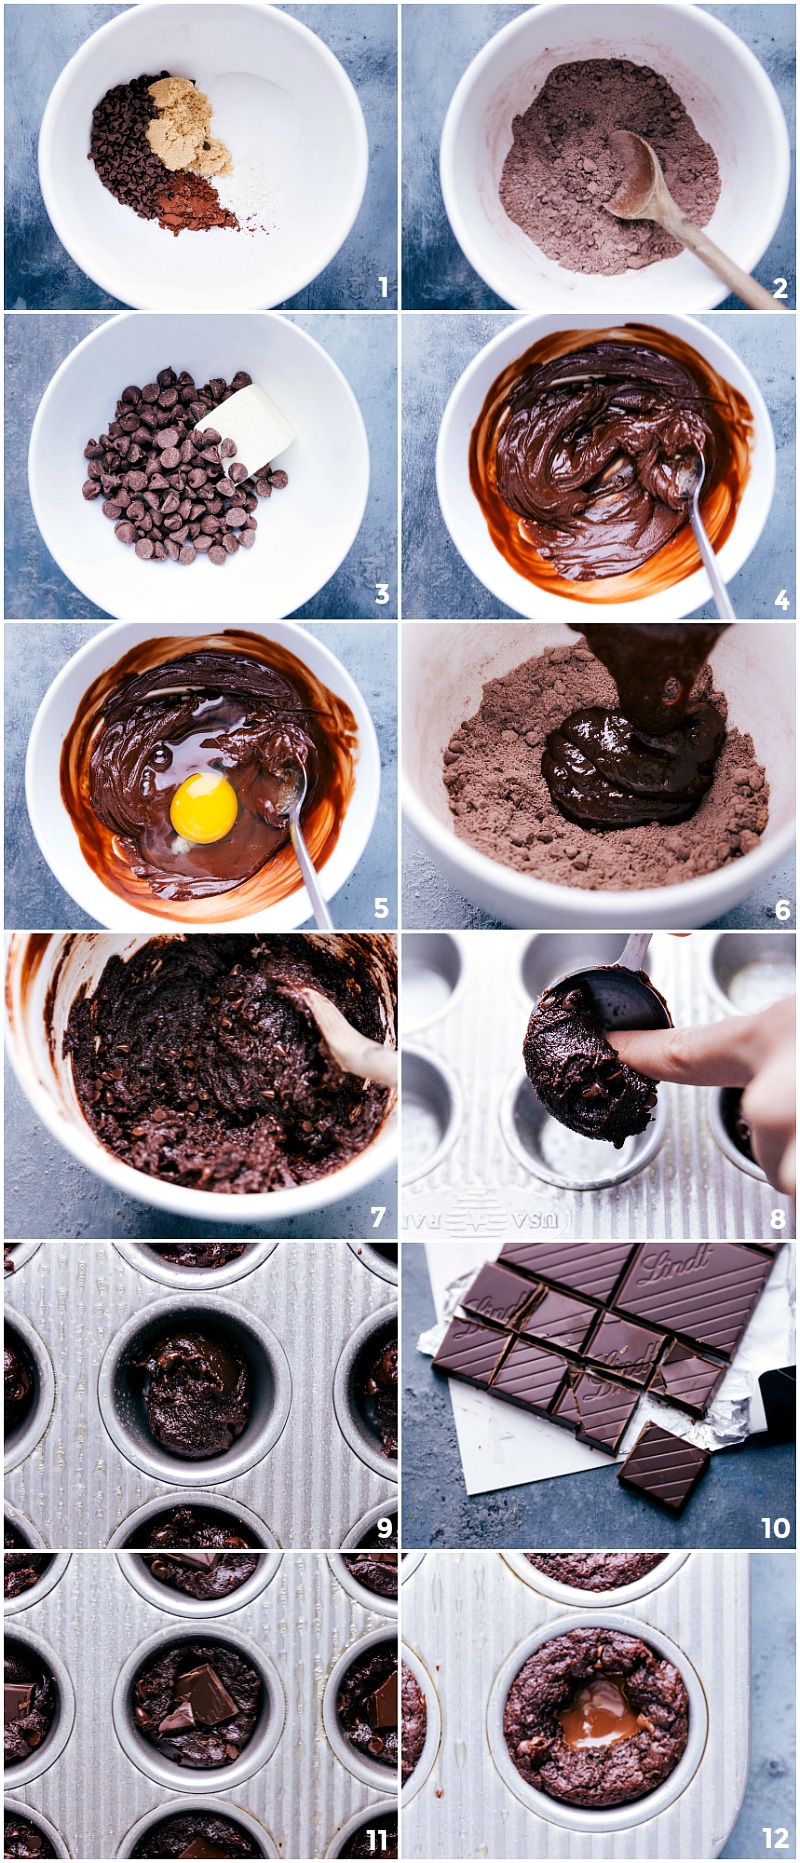
Preparation
Making chocolate lava cookies is a delightful experience that is sure to impress your friends and family. The preparation process involves a few key steps to ensure the perfect balance of flavors and textures.
Melting The Chocolate
To begin, gently melt high-quality dark chocolate in a heatproof bowl over a saucepan of simmering water, stirring frequently until smooth and glossy.
Mixing The Batter
For the batter, combine the melted chocolate with softened butter, granulated sugar, eggs, and vanilla extract, whisking until smooth and well combined.
Chilling The Dough
Next, cover the dough and refrigerate it for at least 30 minutes. This chilling process helps the flavors to meld together and the dough to firm up, making it easier to shape the cookies.
Baking
When it comes to baking the chocolate lava cookies, following the steps correctly is crucial for that perfectly gooey center. Let’s get started with the baking process!
Preheating The Oven
Before you begin assembling the cookie mixture, ensure to preheat the oven to 350°F. This step is vital to achieve the right texture and consistency.
Filling The Ramekins
Take your prepared cookie mixture and fill each ramekin about three-quarters full. This will allow the cookies to rise and create the signature lava center.
Baking Time And Temperature
Place the filled ramekins on a baking sheet and bake in the preheated oven for 10-12 minutes. Keep a close eye on them to avoid overcooking.
Credit: bakewithzoha.com
Serve And Enjoy
Once these decadent chocolate lava cookies are ready, it’s time to indulge in their gooey goodness. Whether you’re treating yourself or delighting guests, serving and enjoying these delightful cookies can be an experience in itself.
Serving Suggestions
- Serve the chocolate lava cookies warm to make the oozing chocolate center even more irresistible.
- Create an indulgent dessert platter by pairing the cookies with a scoop of creamy vanilla ice cream or a dollop of fresh whipped cream.
- For a luxurious touch, drizzle chocolate syrup or caramel sauce on the plate before serving the cookies.
Toppings And Garnishes
- Sprinkle a dusting of powdered sugar over the cookies for an elegant finishing touch.
- Top each cookie with a few fresh berries or a mint leaf to add a pop of color and freshness.
- For a crunchy contrast, scatter chopped nuts such as walnuts or almonds over the cookies before serving.
How To Store Leftover Cookies
If you have any leftover cookies, store them in an airtight container at room temperature for up to 2 days to preserve their rich flavor and gooey texture.
Recipe Variations
In addition to the classic chocolate lava cookie recipe, there are several variations you can try to add a personal touch or cater to different taste preferences. Here are a few ideas to experiment with:
Adding Nuts
If you’re a fan of crunchy textures, adding nuts to your chocolate lava cookies can take them to a whole new level. Pecans, walnuts, or almonds are excellent choices that pair well with the gooey chocolate center.
Using Different Types Of Chocolate
For chocolate lovers who enjoy exploring different flavors, using various types of chocolate can offer exciting taste experiences. Try using dark chocolate for an intense and bittersweet flavor, or white chocolate for a sweeter twist.
Adding Flavored Extracts
If you want to infuse your chocolate lava cookies with interesting flavors, adding a touch of flavored extract is a fantastic option. Vanilla extract is a popular choice, but you can also experiment with almond extract, mint extract, or even orange extract for a citrusy kick.
Remember that these recipe variations are just suggestions – feel free to combine them or come up with your own creative twists. The beauty of chocolate lava cookies lies in their versatility, so don’t be afraid to let your imagination run wild!
Tips And Tricks
Unleash your baking skills with this irresistible Chocolate Lava Cookie recipe. Follow the step-by-step guide for a sweet and gooey treat that will impress even the most discerning dessert enthusiasts. Master the art of creating decadent lava cookies with these expert tips and tricks.
Now that you have the basic recipe for chocolate lava cookies, let’s dive into some tips and tricks to ensure that you achieve the perfect gooey center every time. These simple techniques will elevate your cookies from good to absolutely irresistible!
Ensuring A Gooey Center
Getting that ooey-gooey center just right is the key to a perfect chocolate lava cookie. Here’s how you can make it happen:
- Do not overbake: Remember, the cookies will continue to cook as they cool down. Remove them from the oven when the edges are set, but the centers still appear slightly undercooked.
- Use quality chocolate: High-quality chocolate with a high cocoa percentage melts smoothly and contributes to the desired lava consistency. Opt for semisweet or dark chocolate for the best results.
- Chill the dough: Refrigerating the dough for at least an hour helps the cookies hold their shape while baking, allowing for a gooey center.
- Handle the dough gently: Avoid overmixing or overhandling the dough, as this can result in tough cookies. Stir until just combined and be gentle when forming the dough balls.
- Experiment with timings: Depending on your oven’s temperature and the size of the cookies, you might need to adjust the baking time slightly to achieve the desired texture. Keep a close eye on them!
Using The Right Size Ramekins
The correct size ramekins play a crucial role in creating the perfect chocolate lava cookie. Here’s why:
- Choose small ramekins: Opt for small, individual-sized ramekins for baking your lava cookies. The smaller the ramekin, the more pronounced the lava center will be.
- Grease the ramekins: Make sure to grease the ramekins well before adding the cookie dough. This will help in easily removing the cookies after baking.
- Fill halfway: Fill the ramekins only halfway with the cookie dough to allow room for the cookies to spread as they bake.
Testing For Doneness
Since timing can vary depending on the oven and cookie size, it’s important to test for doneness to ensure your lava cookies are perfectly baked:
- Tap the edges: Give the ramekin a gentle tap on the sides with a spoon. The edges of the cookie should be set, while the center should jiggle slightly.
- Insert a toothpick: Carefully insert a toothpick into the center of the cookie. It should come out with some moist crumbs clinging to it. This indicates that the cookie center is still gooey and delicious.
- Let them rest: Once you’ve determined that the cookies are done, allow them to cool in the ramekins for a few minutes. This helps the center to set slightly without losing its molten consistency.
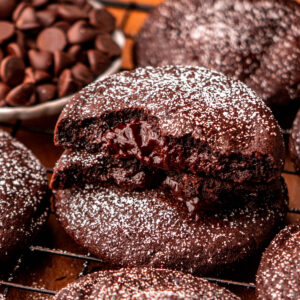
Credit: inbloombakery.com
Conclusion
In a nutshell, this chocolate lava cookie recipe is a game-changer for any dessert lover. By following the simple steps outlined in this guide, you can whip up a decadent treat that will impress your guests and satisfy your sweet tooth.
Don’t hesitate to try this recipe and elevate your baking skills.